رپØAAیل یعنی Ú†Ù‡ - Making Sense Of Technical Drawings
When you first look at a technical drawing, it can feel a little like trying to read a secret code. There are symbols, numbers, and strange markings that, at a glance, just do not seem to make much sense. But these drawings are actually very important maps, showing us how things are put together, or how they should be made. For anyone who is just getting started with making things, like building a custom 3D printer or getting parts ready for a CNC machine, learning to read these maps is a big step. It means you can go from just guessing to actually knowing what you are doing, which is pretty cool.
Figuring out what each little mark means on a drawing can feel like a puzzle, yet it is a puzzle that gives you a lot of good information. Things like a small circle with a line through it, or numbers followed by letters, are not just random scribbles. They are specific instructions, telling you about sizes, shapes, and how different parts connect. Knowing what these symbols communicate helps you avoid mistakes and make sure your parts come out just right. It is a bit like learning a new language, where each symbol is a word that helps build a clear picture of the item you are working with.
So, as you get more comfortable with these drawings, you will find that they start to tell a story. This story is about precision, about how every piece fits, and about making sure that what you imagine in your head can actually become a physical object. It is a pretty rewarding feeling, to be honest, when you can look at a drawing and truly understand the details it is trying to convey. This ability helps you work with others, whether it is a machine shop or another maker, making sure everyone is on the same page about how something should be created.
- Joe Pesci Health A Comprehensive Look At The Iconic Actors Wellbeing
- Richard Hoffman Police
- Lamar Jackson Injury History
- Ome Thunder
- Iran And Pakistan Map
Table of Contents
- What Are These Symbols All About?
- How Do We Read Measurements Like Ø6 or Ø12 x25L, and What Does It Mean for رپØAAیل یعنی Ú†Ù‡?
- What Do the Different Diameter Symbols Tell Us About رپØAAیل یعنی Ú†Ù‡?
- Understanding Those Extra Notes Like "4x" and "Thru All" - What Does It Mean for رپØAAیل یعنی Ú†Ù‡?
- Deciphering Annotations Like R1.25 typ and 2xØ1.0 for رپØAAیل یعنی Ú†Ù‡
- What Does a Flanged Lead Screw Nut Drawing Say About رپØAAیل یعنی Ú†Ù‡?
- How Do We Figure Out the Depth of a Part From a Diagram for رپØAAیل یعنی Ú†Ù‡?
- What Does It Mean When Drawings Talk About Fitting and Tolerances for رپØAAیل یعنی Ú†Ù‡?
What Are These Symbols All About?
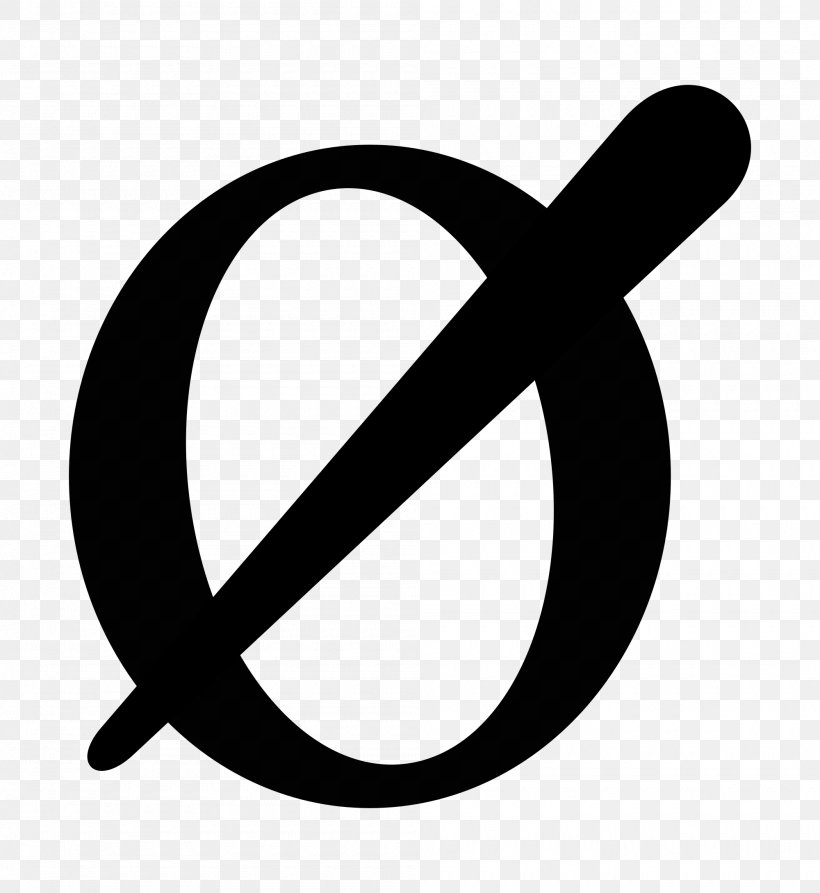
When you are just starting out with mechanical engineering, or maybe building something like your own custom 3D printer, you come across these drawings, and they have symbols that seem a little odd. Take the circle with a line through it, for example, which looks a bit like the letter 'ø'. This symbol, which is often shown as ⌀, is really just a simple way to tell you that a measurement is about the full width of a circle. So, if you see it next to a number, it is talking about how wide a round thing is, right across its middle. This is pretty basic, but it is a fundamental piece of information for anyone trying to make things that fit together. It is, like, a universal sign for "diameter," no matter where you are looking at a drawing.
Then you might see other symbols, or numbers combined with letters, and these too have very specific jobs. For instance, on a drawing for a resistor, you might see something like φ0.55mm. This 'φ' symbol, which is quite similar to the diameter symbol, also talks about a circular measurement. In this case, it is about the width of the wire, and it is usually very precise. Knowing what each of these marks means is what helps you pick the right parts, or make sure your own designs are clear to someone else who might be making them for you. It is, you know, about clear communication in the world of making things.
The goal here, really, is to make these drawings less intimidating. Each symbol, each number, and each bit of text on a technical drawing is there for a reason, to give you a complete picture of the part. Once you get a handle on what these basic marks represent, the whole drawing starts to open up, and you can begin to see the item it describes in your mind. It is, perhaps, a bit like learning to read a map; once you know what the symbols for roads and rivers mean, you can find your way around much more easily. This helps you figure out the meaning of رپØAAیل یعنی Ú†Ù‡ in the context of these drawings.
How Do We Read Measurements Like Ø6 or Ø12 x25L, and What Does It Mean for رپØAAیل یعنی Ú†Ù‡?
When you come across something like "Ø6" on a drawing, especially for something like the pinion attached to a stepper motor, it is actually pretty straightforward. The 'Ø' symbol, as we talked about, stands for diameter. So, "Ø6" just means that the circular part, in this case, the pitch diameter of that pinion, needs to be six millimeters across. This is a very direct way of giving a size for a round component. For someone trying to model parts for a 3D printer, knowing this exact measurement is pretty important for things to fit and work together properly. It is, like, a fundamental piece of information for getting your designs right.
Now, things can get a little more interesting when you see something like "ø12 x25l" for an oval hole on a plastic piece. You know that the "ø12" part means it is twelve millimeters wide, across the circular part of that oval. But what about the "x25l"? This is where the drawing tells you more about the shape's overall dimensions. The "x25l" is likely telling you the length of that oval, or perhaps how far apart the centers of the two half-circles are that make up the oval shape. It is, you know, giving you the other important measurement to fully define that oval. This kind of combined measurement is a common way to describe shapes that are not just simple circles or squares, providing all the necessary information in one go. It is a bit like saying "this much wide, and that much long," for a specific feature, which is what رپØAAیل یعنی Ú†Ù‡ is all about.
Understanding these combined measurements is a step up in reading drawings. It means you are not just looking at single numbers but seeing how they work together to describe a more complex shape. For someone new to mechanical engineering, figuring out these combinations is a really good skill to develop. It helps you make sure that when you draw something up in a program like Inventor, or send it off to a CNC service, everyone understands exactly what shape and size that oval hole needs to be. This precision is what makes parts fit perfectly and machines run smoothly, you know, making sure everything aligns just so.
What Do the Different Diameter Symbols Tell Us About رپØAAیل یعنی Ú†Ù‡?
It can be a little confusing when you see different versions of the diameter symbol, like 'ø' or 'φ', or even the unicode character ⌀ (U+2300). They all essentially mean the same thing: the full width of a circular feature. The reason for the different appearances often comes down to the font or typeface being used in the drawing. Sometimes, the symbol might look exactly like a lowercase 'o' with a slash through it, and other times it might have a slightly different look, perhaps a little taller or with a different slant to the line. But, basically, if you see any of these, they are all pointing to a circular measurement. This is, you know, a common thing in technical documents, where symbols can have slight variations in how they look but carry the same meaning.
For example, on a technical drawing for resistors, you might find the lead diameter given as φ0.55mm. Here, the 'φ' is being used to denote the diameter of the wire. What is interesting is that if you also see that the wire is specified as "24 swg," which is a standard wire gauge, and that gauge typically has a diameter of 0.559mm, it shows just how precise these drawings are meant to be. The slight difference between 0.55mm and 0.559mm might seem tiny, but in manufacturing, these small variations can matter a lot. It is, like, a way of double-checking that the drawing's number aligns with known standards, which is pretty important for consistency. This helps us get a fuller picture of رپØAAÛŒÙÙ„ یعنی Ú†Ù‡.
So, the takeaway here is not to get too caught up in the exact look of the diameter symbol. What matters is that you recognize it as an instruction for a circular measurement. Whether it is 'ø', 'φ', or ⌀, they all communicate the same basic idea: how wide something round is. This consistency in meaning, despite slight visual differences, is what makes technical drawings a universal language for makers and engineers. It is, perhaps, a bit like how different accents do not change the meaning of words in a conversation, allowing for clear communication about the details of a part.
Understanding Those Extra Notes Like "4x" and "Thru All" - What Does It Mean for رپØAAیل یعنی Ú†Ù‡?
When you see a note like "4x" next to a dimension on a drawing, it is a really helpful shortcut. It means that whatever dimension or feature is being described applies to four different places on the drawing that look the same. So, if you see "4x Ø5," it is telling you that there are four holes, and each one of those holes needs to be five millimeters across. This saves a lot of space on the drawing and makes it much easier to read, as you do not have to repeat the same information over and over for identical features. It is, you know, a very efficient way to convey information, making the drawing less cluttered.
Then there is the phrase "thru all." This is another common instruction, especially when talking about holes. When a drawing says "Ø5 thru all," it means that the hole, which is five millimeters wide, needs to go completely through the entire piece of material. It is not just a partial hole or a blind hole that stops somewhere inside the material. This note removes any doubt about the depth of the hole, making it clear that the drill or cutting tool needs to pass all the way through the material from one side to the other. This is, like, a very direct command about how a feature should be made, which is pretty important for anyone doing machining. It helps clarify رپØAAیل یعنی Ú†Ù‡ in the context of hole making.
These kinds of notes, like "4x" and "thru all," are really important for ensuring that parts are made correctly. They are not just extra words; they are vital instructions that tell the person making the part exactly what to do. For someone new to mechanical engineering, learning to spot and understand these notes is a big step in reading drawings like a pro. They help you avoid making assumptions and ensure that the final product matches the design perfectly. It is, perhaps, a bit like getting clear directions for a recipe, making sure every step is followed precisely to get the right outcome.
Deciphering Annotations Like R1.25 typ and 2xØ1.0 for رپØAAیل یعنی Ú†Ù‡
When you are looking at an AutoCAD drawing, or any technical drawing, you will often see annotations that seem a little cryptic at first. Take "R1.25 typ" for a circle or hole on the left. The 'R' here stands for radius, so "R1.25" means that this particular feature has a curve, or a round edge, with a radius of one and a quarter millimeters. The "typ" part is short for "typical," and it means that this radius applies to all similar features on the drawing, even if they are not explicitly marked with "R1.25." It is, you know, a way to keep the drawing clean by not repeating the same information everywhere, assuming that if something looks the same, it is the same size. This helps in understanding the general design intent without too much clutter.
Then you might see something like "2xØ1.0" for a circle or hole on the right. We already know 'Ø' means diameter, and the '1.0' means one millimeter. The "2x" tells us that there are two of these holes, each with a diameter of one millimeter. So, if you see two holes that look alike in that area, this annotation confirms their size and quantity. This is a very common way to specify multiple identical features without having to label each one individually. It is, like, a very efficient way to communicate, especially when you have many small features that are the same size. This directly relates to figuring out رپØAAیل یعنی Ú†Ù‡ in practical terms.
And then there is "Ø1.25" for a circle or hole at the bottom. This is just a straightforward diameter measurement, meaning that particular hole needs to be one and a quarter millimeters across. These annotations, when you put them all together, give you a very clear picture of the different circular features on a part. They tell you not only the size but also how many of each feature there are and whether a dimension is typical for similar shapes. For someone trying to model parts for a 3D printer or send them to a CNC service, understanding these notes is absolutely key to getting the dimensions right and making sure the final part matches the design. It is, perhaps, a bit like reading a recipe where each ingredient and step is clearly outlined, ensuring the final dish turns out as intended.
What Does a Flanged Lead Screw Nut Drawing Say About رپØAAیل یعنی Ú†Ù‡?
When you are trying to model parts for a custom 3D printer, and you find a drawing for something like a flanged lead screw nut, it can be a little tricky to read all the dimensions. A flanged lead screw nut has a main body that threads onto a lead screw, and then a wider, flat part, or flange, that usually has holes for mounting. The drawing will have many numbers and symbols, each describing a different part of this component. You will likely see diameter symbols for the main body of the nut, for the threaded section, and for the mounting holes on the flange. It is, you know, a very detailed map of the part's shape and size.
The challenge often comes when the drawing specifies things like the pitch diameter of the threads, or the exact dimensions of the flange itself, including its thickness and the spacing of the mounting holes. These dimensions are absolutely critical for the nut to fit correctly onto the lead screw and to attach securely to your 3D printer frame. If you are having a hard time reading these dimensions, it is probably because they are presented in a very precise, technical way that assumes some prior knowledge of mechanical drawing standards. It is, like, a language that needs some learning to fully grasp, which is pretty common for newcomers.
Sometimes, the drawing might also include notes about tolerances, which tell you how much variation is allowed in a measurement. For a flanged lead screw nut, getting these dimensions right is extremely important for the smooth operation of your 3D printer. A nut that is too tight or too loose on the lead screw, or a flange that does not align with your mounting points, can cause big problems. So, understanding every number and symbol on that drawing is key to making sure your 3D printer works as it should. It is, perhaps, a bit like following assembly instructions for a complex piece of furniture; every little detail matters for the final product to be stable and functional, which really gets to the heart of رپØAAیل یعنی Ú†Ù‡.
How Do We Figure Out the Depth of a Part From a Diagram for رپØAAیل یعنی Ú†Ù‡?
When you are looking at a diagram and trying to understand the depth of a part, it can sometimes be a bit of a puzzle, especially if you are new to mechanical drawing. Drawings usually show an object from different views: a top view, a front view, and a side view. Each view gives you different information about the part's dimensions. The depth, or thickness, of a part is usually shown in either the front or side view, or sometimes both. You will see lines representing the different surfaces, and numbers indicating the distance between those surfaces. It is, you know, a way of showing a three-dimensional object on a flat piece of paper.
Sometimes, the depth might be implied by other features, or there might be a specific dimension line with a number pointing to the overall thickness. For example, if you have a part drawn up in Inventor, you would input these dimensions to create the 3D model. If you are struggling to interpret the depth from a practice example diagram, it is probably because you are still getting used to how these different views relate to each other. It is, like, learning to mentally combine the flat pictures into a solid object in your mind, which is pretty common when you are just starting out.
The key to figuring out depth is to look at all the views provided and see how the lines align. A line that appears as an edge in one view might represent a surface that extends a certain depth in another view. Also, look for specific dimension callouts that have an arrow pointing from one surface to another, with a number in between. That number will tell you the depth. Getting this right is very important, especially if you plan to send the part to a CNC service for machining, because they need to know the exact thickness of the material to cut. It is, perhaps, a bit like trying to understand a building from its blueprints; you need to look at all the different floor plans and elevations to grasp the full structure, which is a core part of رپØAAیل یعنی Ú†Ù‡.
What Does It Mean When Drawings Talk About Fitting and Tolerances for رپØAAیل یعنی Ú†Ù‡?
When technical drawings mention "fitting" and "tolerances," they are talking about how precisely parts need to be made so they can work together properly. "Fitting" refers to how one part connects with another – whether it is a tight fit, a loose fit, or something in between. For example, if you have a shaft going into a hole, the drawing needs to specify how much space, or how little space, there should be between them for the assembly to function as intended. This is, you know, a very important consideration for anything that moves or needs to be assembled without force.
Then there are "tolerances." A tolerance is the allowable amount of variation in a dimension. No manufacturing process can make a part to an exact, perfect size every single time. So, drawings include tolerances to tell the manufacturer how much bigger or smaller a dimension can be and still be acceptable. For instance, a diameter might be given as "Ø10 ±0.05mm," meaning the hole should be 10 millimeters, but it is okay if it is anywhere between 9.95mm and 10.05mm. This range is the tolerance. It is, like, setting boundaries for acceptable sizes, which is pretty crucial for mass production and part interchangeability.
You might also see notes about using the "minimum circumscribed" or "maximum inscribed" circle to tolerance a diameter. This is a more advanced concept related to how the measurement is taken and how the part is
- Exploring The Race Of Steve Perry A Deep Dive Into His Background And Legacy
- Net Worth Of Jojo Siwa
- Where Is Phoebe Cates Now A Look Into Her Life And Career
- Ralph Macchio Net Worth
- Mysterious Skin Bathroom

Diameter Symbol (ø, Ø) - Copy and Paste Text Symbols - Symbolsdb.com
Diameter Ø Symbol Mathematical Notation Circle, PNG, 2000x2179px

Diameter symbol Ø - Autodesk Community
