Eyebrow Tint At Home - Your Guide To Fuller Brows
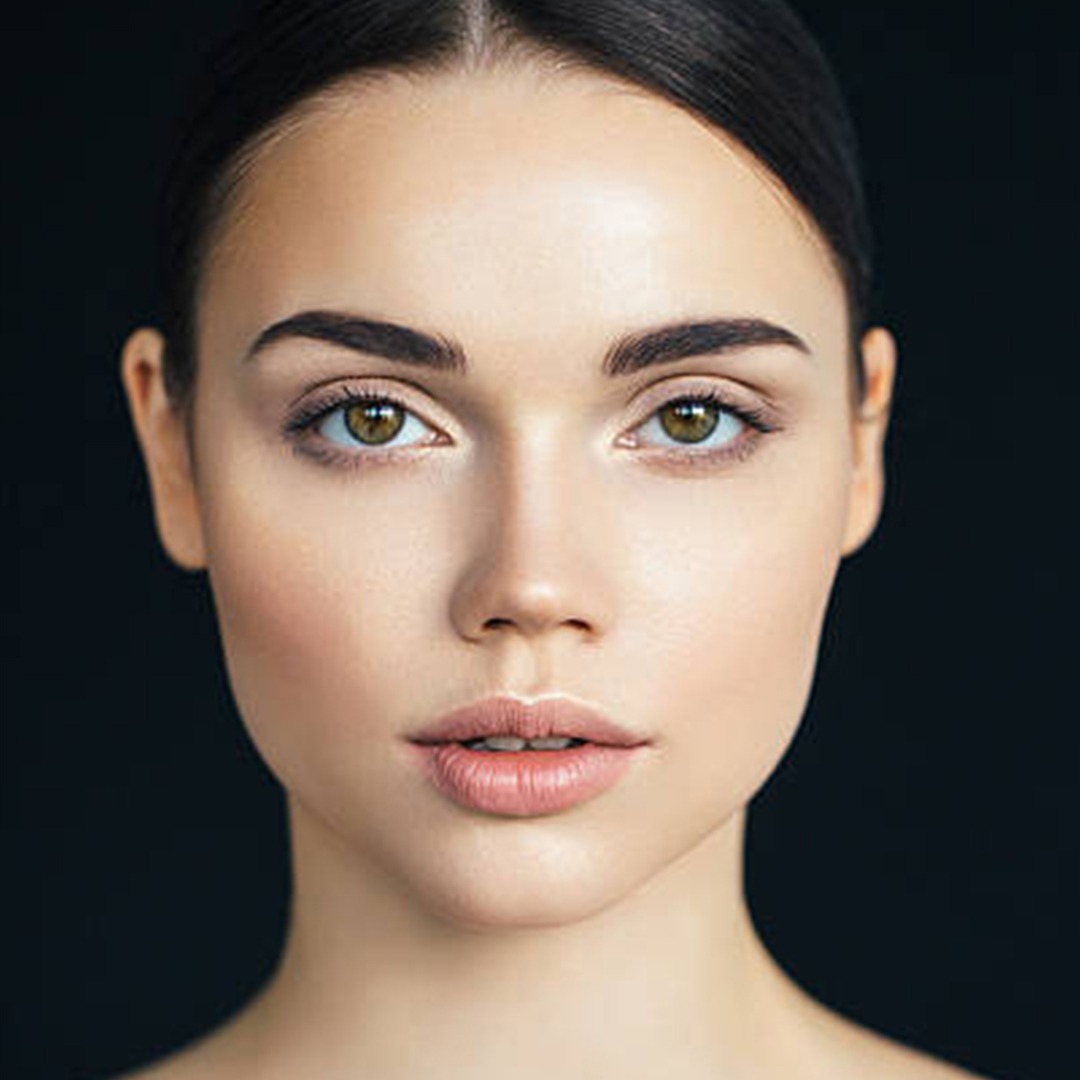
Giving your eyebrows a little extra something, like a deeper color, has become quite a popular thing to do these days. Many people are looking for ways to make their brows appear a bit more noticeable, perhaps even fuller, without having to reach for a pencil or powder every single morning. This idea of adding a gentle tint right there in your own space, it's almost like giving your face a small, yet rather impactful, makeover that sticks around for a little while. It's about bringing out the natural beauty of your brows, making them look a bit more defined and polished, you know?
When you think about it, those little arches of hair above our eyes do quite a lot, don't they? They help frame our face, giving it shape and balance. And, in some respects, they are pretty good at showing what we are feeling. A slight lift of one brow can express curiosity or a touch of disbelief, for instance. So, when you consider how much work our eyebrows do, it makes sense that we'd want them to look their very best, naturally.
For those who might have lighter brow hairs, or perhaps some gaps that they wish were less obvious, a home eyebrow tint could be just the thing. It’s a way to add some depth to those lighter strands, making them stand out more and giving the appearance of a thicker, more complete brow. It’s a pretty simple process once you get the hang of it, and it can really make a difference in how your face feels put together, especially without a lot of daily effort.
- Denzel Washington Training Day
- Horses Mating
- Ripped Reiley
- Is Cal Raleigh Married
- Aishah Sofey New Leaked
Table of Contents
- What Makes Eyebrows So Important, Anyway?
- Getting Started with Eyebrow Tint at Home - What You Need
- Is Eyebrow Tint at Home Right for You?
- How to Prepare for Your Eyebrow Tint at Home Session
- What's the Process for Eyebrow Tint at Home?
- Keeping Your Eyebrow Tint at Home Looking Good
- What Should You Consider Before Trying Eyebrow Tint at Home?
- The Final Word on Eyebrow Tint at Home
What Makes Eyebrows So Important, Anyway?
Our eyebrows, those short lines of hair just above our eyes, actually play a very big part in how we look and how we show what we are thinking. They follow the curve of the bone just below our forehead, and they do a couple of main jobs for us. One big thing is that they help keep things like sweat or rain from dripping right into our eyes, which is pretty handy, you know? It's like a little natural shield, keeping our vision clear.
But beyond just keeping things out of our eyes, eyebrows are, actually, incredibly expressive. They are a key part of how we communicate without even saying a word. Think about it: a quick lift of one eyebrow can signal that you are a little bit unsure or perhaps quite interested in something. Both eyebrows raised high might show surprise, while a furrowed brow can mean you are concentrating or maybe a little bit worried. They really add a lot to our facial expressions, making our feelings much clearer to others.
And then there is the way they shape our face. Eyebrows act like a frame for our eyes, which are often called the windows to our soul. The way your brows are shaped can really change the whole look of your face, making your eyes seem bigger or smaller, or making your face appear more oval or round. There are so many different shapes people have, from those that are fairly straight across, to those with a nice arch, or even ones that are more rounded. Finding a shape that suits your face can sometimes feel like a bit of a puzzle, but when you get it right, it just makes everything seem to fit better, doesn't it?
Getting Started with Eyebrow Tint at Home - What You Need
If you are thinking about trying an eyebrow tint at home, gathering all your bits and pieces beforehand makes the whole process much smoother. You will want to pick up a tinting kit that is made specifically for eyebrows, as hair dye for your head is usually too strong for the delicate skin around your eyes. These kits typically come with the color cream and a developer, which is the stuff that helps the color stick. Make sure to choose a color that is just a shade or two darker than your natural brow hair for a look that is, you know, believable and not too harsh.
Beyond the kit itself, there are a few other items that will make your eyebrow tint at home session a lot easier and cleaner. You will want some cotton swabs or a small, angled brush for putting the color on, as well as some cotton pads or balls for wiping it off. A small dish or bowl for mixing the tint is also pretty useful. And, very importantly, you will need something to protect your skin around the brows from getting stained, like petroleum jelly. This acts as a barrier, stopping the tint from coloring skin you do not want tinted. It's really about being prepared, so you don't have to scramble mid-way through the process.
Also, having a timer handy is quite important. The tint needs to stay on for a specific amount of time, and going over or under that time can change how the color turns out. Too little time, and it might not be dark enough; too much, and it could get too dark or even stain your skin a bit. So, a kitchen timer or even your phone timer will work just fine. And, finally, a mirror that gives you a good, clear view of your face is, obviously, a must. Some people like a magnifying mirror for this, just to see those tiny hairs clearly. Having everything ready to go means you can focus on getting your eyebrow tint at home just right.
Is Eyebrow Tint at Home Right for You?
Deciding if an eyebrow tint at home is a good idea for you really comes down to a few things. If your eyebrow hairs are quite light, perhaps blonde or very fair, and you find yourself always trying to make them stand out more with makeup, then tinting could be a great solution. It gives those lighter hairs some actual color, making them visible and giving the appearance of a fuller brow without any daily effort. This can be a real time-saver, you know, especially on those mornings when you are in a rush.
However, it is not for absolutely everyone. If you have very sensitive skin, or if you have had any kind of allergic reaction to hair dyes or other beauty products in the past, then you might want to be a little bit cautious. Doing a patch test, which we will talk about soon, is absolutely necessary to make sure your skin gets along with the tint. Also, if your eyebrows are already quite dark and full, you might not see as dramatic a change with tinting, as the purpose is mostly to add color to lighter hairs or make existing ones seem more prominent. It really depends on what you are looking to achieve, in a way.
People who are looking for a very natural, yet noticeable, improvement to their brow appearance often find eyebrow tint at home to be a pretty good fit. It is less about creating a whole new shape and more about enhancing what you already have. If you are someone who likes to keep things low-maintenance but still wants to look put-together, then this might be a simple way to achieve that. It's a subtle change that can, honestly, make a big difference to how your face feels framed and defined, without feeling like you have drawn on your brows every day.
How to Prepare for Your Eyebrow Tint at Home Session
Getting ready for your eyebrow tint at home session is just as important as the tinting itself. The first thing you will want to do is make sure your brows are clean and free of any makeup, oils, or lotions. Use a gentle cleanser to wash your face, paying special attention to your brow area. Any leftover product can stop the tint from sticking to your hairs properly, so a clean canvas is, basically, what you are aiming for. Make sure your brows are completely dry before you move on to the next step, too.
Next up, it is a good idea to think about shaping your brows, if that is something you usually do. Whether you prefer to tweeze away stray hairs, thread them, or even give them a quick wax, doing this before you tint can help the tint highlight your desired shape. If you tint first, and then remove hairs, you might end up with little light spots where the hair used to be, which is not really what you want. So, get your brows into their preferred form first, making sure to wipe away any residue from your shaping method. This helps the eyebrow tint at home look its best.
And, perhaps the most important preparation step is the patch test. Even if you have used hair dye before, or even if you have used the same brand of tint, it is always wise to do a small test on a tiny, hidden bit of skin, like behind your ear or on your inner arm. Mix a very small amount of the tint and apply it there, leaving it for the recommended time, and then wash it off. Wait at least 24 to 48 hours to see if you have any bad reactions, like redness, itching, or swelling. This step is super important for your safety, as a matter of fact, making sure your eyebrow tint at home experience is a good one.
What's the Process for Eyebrow Tint at Home?
Once you have done your patch test and gathered all your supplies, you are ready to start the actual eyebrow tint at home process. First, apply a thin layer of petroleum jelly around your eyebrows, making sure to get it on the skin but not on the brow hairs themselves. This creates a barrier that stops the tint from staining your skin outside the brow area. Be pretty careful with this step, as any jelly on the hairs will stop the tint from working on those spots. It's a simple trick, but it really helps keep things tidy.
Next, mix the tinting cream and the developer together in your small dish, following the directions in your kit very carefully. The proportions are usually quite specific, so do not just guess. Use your cotton swab or angled brush to apply the mixed tint to your eyebrows. Start by putting a layer on the hairs, making sure to cover every single one from root to tip. You can work in small sections, making sure the tint gets all the way through the brow. Some people find it easier to do one brow at a time, just to keep things organized.
Once the tint is on, set your timer for the amount of time recommended in the instructions. This is typically anywhere from 5 to 10 minutes, depending on how dark you want your brows to be and how light your natural hairs are. Do not leave it on longer than the maximum time suggested, as this can lead to overly dark brows or even skin irritation. While you wait, you might feel a slight tingling sensation, which is usually normal, but if it starts to burn or itch badly, you should, basically, remove it right away. This waiting period is, obviously, the hardest part for some people.
When the timer goes off, it is time to take the tint off. Use a damp cotton pad or ball to gently wipe away the tint from your eyebrows. Start from the inner part of your brow and work your way outwards, making sure to get all the color off. You might need a few fresh cotton pads to get everything clean. Once the tint is completely removed, you can rinse your face with cool water to make sure there is no residue left. And there you have it, your new, more defined eyebrows, all thanks to your eyebrow tint at home efforts!
Keeping Your Eyebrow Tint at Home Looking Good
After you have successfully tinted your eyebrows at home, you will want to do a few things to help the color last as long as possible. The tint usually stays put for about two to four weeks, but this can vary depending on your hair type and how you care for them. One of the simplest ways to make the color stick around is to avoid harsh cleansers or scrubs directly on your brows. Products that contain oil or strong chemicals can actually break down the tint pretty quickly, causing it to fade faster than you would like. So, when you wash your face, try to gently cleanse around your brows, or use a very mild soap.
Also, try not to rub your eyebrows too much, especially when you are drying your face with a towel. A gentle pat is usually enough. Frequent rubbing can wear down the tint and make it look less vibrant. If you use any eyebrow gels or waxes for styling, try to choose ones that are not oil-based, as these can also cause the tint to fade. It's about being a little bit mindful of what touches your brows, to be honest. These small habits can really extend the life of your eyebrow tint at home.
Sun exposure can also make your eyebrow tint fade more quickly, just like it can lighten the hair on your head. If you spend a lot of time outside, consider wearing a hat or using a brow product with SPF, if you can find one, to help protect the color. Re-tinting your brows every few weeks is also a good way to keep them looking fresh. Just remember to always do a new patch test, especially if it has been a while since your last tint or if you are trying a new product. Consistency in care is, basically, key to maintaining that lovely, deeper brow color from your eyebrow tint at home.
What Should You Consider Before Trying Eyebrow Tint at Home?
Before you commit to trying an eyebrow tint at home, there are some important things to think about. First off, consider the color you are choosing. It is generally a good idea to go for a shade that is only one or two steps darker than your natural brow hair. Going too dark can look quite unnatural and might be a bit shocking when you first see it. If you are unsure, it is often better to start with a lighter shade, as you can always go a little bit darker next time if you feel it is not enough. Getting the color right is, obviously, a big part of being happy with the results.
Also, think about your skin tone and hair color. While the tint is for your brows, it should still look harmonious with your overall look. Someone with very light hair and skin might find a very dark tint too harsh, while someone with darker features might need a deeper shade to see a noticeable difference. It is about finding that sweet spot where your brows look fuller and more defined, but still very much a part of your natural appearance. This balance is, you know, what makes the tint look good.
Finally, set your expectations. An eyebrow tint at home will darken your existing brow hairs, making them more visible and giving the appearance of a fuller brow. It will not, however, make new hairs grow where there are none, nor will it drastically change the shape of your brows. If you are looking for a complete reshaping or to fill in very sparse areas, you might need to consider other options like brow lamination or microblading, which are different treatments entirely. Tinting is a great way to enhance what you already have, making your natural brows stand out more, which is, in some respects, a pretty simple way to feel more polished.
The Final Word on Eyebrow Tint at Home
Giving your eyebrows a little color at home can be a really simple and effective way to make them look more defined and fuller. It is about bringing out the natural beauty of your brows, making those lighter hairs stand out and framing your face in a lovely way. Remember, it all starts with choosing the right color, making sure you have all your bits and pieces ready, and, very importantly, doing that little patch test to keep things safe. Preparing your brows by cleaning and shaping them first helps the tint do its best work, too. When you put the tint on, be careful and follow the timing instructions to get the look you want.
After you are done, taking good care of your tinted brows by avoiding harsh cleansers and too much rubbing can help the color last longer. While tinting is great for making your existing brows more noticeable, it will not create new hairs or completely change their shape. It is a fantastic option for a low-maintenance, polished look that really highlights your natural features. So, if you are looking for a subtle but impactful way to give your brows a boost, an eyebrow tint at home might just be the thing for you.
- Daisys Destruction
- Neuro Gum Net Worth
- Lagos Cerca De Mi
- Aishah Sofey Leak Free
- How Much Is A House In Iran
Eyebrow Tint | Fleeked Beauty

Beginner’s Guide on How to Remove Eyebrow Tint Safely

How To Make Eyebrow Tint Last Long - EyebrowShaper
