Easy Floral Nail Designs- Simple Beauty For Your Fingertips
Do you ever look at those stunning nail art pictures and think, "I could never do that"? Well, that feeling is about to change, because getting beautiful nails with a touch of nature's charm is actually much simpler than you might think. You really don't have to be a professional artist to add some lovely floral patterns to your fingertips. It's almost like baking a delicious treat without needing to be a pastry chef; you can absolutely get a delightful result with just a few straightforward steps.
Adding a little something special to your nails can feel like a small personal victory, a pretty way to express yourself. It’s a bit like finding those quick dinner ideas that get a satisfying meal on the table fast, or discovering easy breakfast ideas that help you start your day with something delicious, even when you are busy. You just need a few basic tools and a bit of patience, and you can create something truly charming. It’s a wonderfully accessible way to brighten your day, or perhaps even someone else's, with a little bit of color and design.
This whole idea is about making beauty approachable for everyone. You see, you don't need a huge collection of fancy polishes or specialized equipment to achieve a delicate flower look. We're going to explore some ideas that are, honestly, pretty much foolproof. Think of it as finding ways to get more out of your everyday life, just like how a smart, clean, and powerful email solution helps you get more out of the web. It's about finding the simple joys and making them happen for yourself, and your nails are a perfect canvas for that kind of creative play.
- Leaked Scarswonderland
- Joe Pesci Health A Comprehensive Look At The Iconic Actors Wellbeing
- 124 Squid Game Death
- Bomb Iran Vince Vance
- Morten Harket The Voice Of Aha And His Enduring Legacy
Table of Contents
- Why Do We Love Floral Nail Designs So Much?
- Gathering Your Simple Floral Nail Tools
- Getting Started- Prep for your Easy Floral Nails
- Can Anyone Really Do Easy Floral Nail Designs?
- Simple Floral Nail Ideas to Try
- Making Your Easy Floral Nails Pop
- Beyond the Basics- More Easy Floral Touches
Why Do We Love Floral Nail Designs So Much?
There's something truly appealing about flowers, isn't there? They bring a sense of freshness, growth, and natural beauty wherever they are. So, it's really no wonder that bringing that feeling to our fingertips with floral nail designs has become such a popular choice. It's a way to carry a little piece of that cheerful, outdoor vibe with you, no matter where you go or what you're doing. It can make you feel a little more connected to nature, perhaps even on a grey day, which is actually quite nice.
A floral pattern on your nails can easily match so many different moods and outfits. You can make it bright and bold, or keep it soft and subtle. It’s quite versatile, really. Just like how some recipes can be turned into a savory side dish, a satisfying main, or even dessert by adding just a few other ingredients, floral designs offer a lot of room for personal expression. You might be surprised at how much a simple flower can change the whole feel of your hands, making them seem more delicate and cared for, too.
Also, there's a certain timelessness to flowers. They never really go out of style, do they? So, choosing an easy floral nail design means you're picking something that will always feel fresh and lovely. It's a bit like choosing a classic song; it always sounds good. This kind of design often brings a smile, whether it's to you looking down at your hands or to someone else catching a glimpse. It’s a gentle reminder of beauty, and that, in some respects, is a wonderful thing to have.
- From Champion To Inspiration Ronnie Coleman Now
- Himynamestee Only Fans
- Two Babies One Fox X
- What Does The Term Eiffel Tower Mean
- Ittesu Suzuki
Gathering Your Simple Floral Nail Tools
Before you start painting your easy floral nail masterpieces, it helps to have a few things ready. You don't need a huge setup, honestly. Think of it like gathering ingredients for a simple, delicious treat; you just need the basics. First off, you'll want a few nail polish colors. A good white or light cream for the flower petals, a brighter color for the center, and maybe a green for leaves are usually a good start. Pretty much any polish you have can work, so don't feel like you need to buy anything special just for this.
Next, you'll need something to make the dots or strokes for your flowers. A dotting tool is ideal if you have one, but if not, don't worry! A toothpick works wonderfully for small dots, and the tip of a bobby pin can also create a nice, round shape. Even the end of a small paintbrush, or a clean pencil eraser, could be used for slightly larger dots. It’s all about using what's available to you, which is actually a very practical approach to things like this. You might find you already have everything you need lying around, as a matter of fact.
You'll also want a base coat and a top coat. The base coat helps protect your natural nails and gives the polish something to really stick to, making your design last a bit longer. The top coat, meanwhile, seals everything in, gives it a nice shine, and adds another layer of protection. This is kind of like how a good email service helps organize all the things life throws at you, like receipts; it just makes everything smoother and more secure. And, of course, some nail polish remover and cotton swabs are always good to have nearby for any little clean-ups or redo moments, because sometimes things just happen.
Getting Started- Prep for your Easy Floral Nails
Prepping your nails before you start painting is a pretty important step for any nail design, especially for easy floral nails, because it helps your art look its best and last longer. First, make sure your nails are clean and dry. Any old polish should be completely removed. Then, gently push back your cuticles and shape your nails the way you like them. This makes for a nice, smooth surface to work on, which is actually quite helpful.
After that, apply a thin layer of your base coat. Let it dry completely. This step is a bit like getting your canvas ready before you start painting; it provides a good foundation. You might think it's not strictly necessary, but it really does make a difference in how well your polish adheres and how long your beautiful easy floral design stays looking fresh. It's a small effort that pays off, honestly.
Once your base coat is dry, apply one or two thin layers of your chosen background color. This could be a light pastel, a clear polish, or even a darker shade if you want your flowers to really pop. Let each layer dry fully before applying the next. This patience is key, as wet polish can easily smudge and mess up your careful work. It's like waiting for that delicious treat to cool before you slice into it; it just makes for a better outcome, you know?
Can Anyone Really Do Easy Floral Nail Designs?
The short answer is a definite "yes"! Anyone can absolutely create charming easy floral nail designs. You don't need a steady hand that belongs in a museum or years of art school training. The beauty of these particular designs is that they embrace simplicity and even a little bit of imperfection. Think of it like cooking with seasonal produce from the local farmers market; you don't have to be a gourmet chef to make mealtime special, you just need good ingredients and a willingness to try. Similarly, with nails, you just need a bit of color and a simple tool.
Many of the easiest floral patterns are made from simple dots or short strokes. If you can make a dot with a toothpick, you can make a flower. It's really that straightforward. Sometimes, the most natural-looking flowers on nails are those that aren't perfectly symmetrical, which is quite freeing, actually. This means less pressure on you to get everything just right, allowing for a more relaxed and enjoyable creative process. It's sort of like how some of those dessert recipes from Food Network are designed to satisfy any sweet tooth, vegan or not; they are just universally appealing and accessible.
So, if you've ever felt like nail art was something only for others, or that it was too complicated, this is your moment to reconsider. These easy floral designs are a wonderful way to dip your toes, or rather, your fingers, into the world of nail decoration. It’s about having fun and adding a little personal flair, not about achieving salon-level perfection on your first try. And you know, often, the things we create ourselves, even if they're not absolutely flawless, carry a special kind of charm anyway. They tell a story of your effort and creativity, and that's pretty cool.
Simple Floral Nail Ideas to Try
Now for the fun part: actually creating some lovely easy floral nail designs! We'll go through a few different ways to make simple flowers, each building on very basic techniques. Remember, the goal here is ease and enjoyment, not perfection. You can try these on all your nails, or just do an accent nail or two. It's completely up to you, which is great because it means you have lots of freedom. You'll find that with just a little practice, these designs will come together quite quickly, almost automatically.
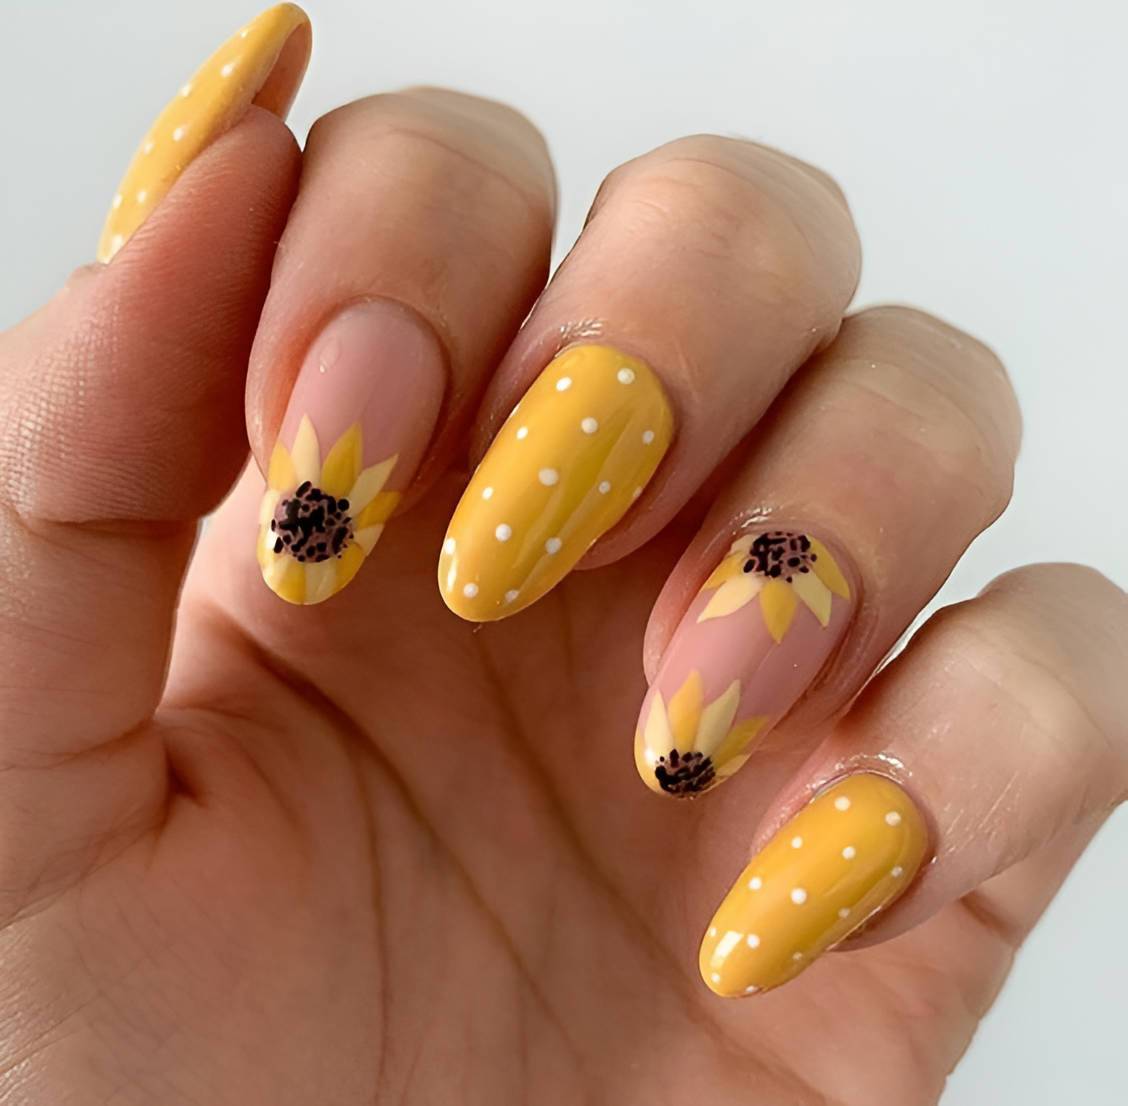
Daisy Dots- A Very Easy Floral Design
This is probably one of the simplest and most charming easy floral designs you can try. It's basically just a few dots arranged in a circle. First, make sure your background color is completely dry. Then, pick a color for your petals, usually white or a light pastel works best for a classic daisy look. Using your dotting tool or a toothpick, place five small dots in a circle on your nail. Try to keep them somewhat close together, but don't worry if they aren't perfectly spaced; that's part of the charm, honestly.
Once you have your petal dots, clean your tool and pick up a contrasting color for the center of your flower. Yellow is a classic choice for daisies, but you could use orange, brown, or even a bright pink. Place one single dot right in the middle of your circle of petal dots. And just like that, you have a lovely little daisy! It's really that simple. You can make these on every nail, or perhaps just on your ring finger for a subtle touch. It's a very forgiving design, too, which is helpful if you're just starting out.
You can vary the size of your daisy dots by using different sized tools. A larger dotting tool for the petals and a smaller one for the center can create a bigger flower, while a toothpick will give you tiny, delicate blooms. You could even use two different colors for the petals, alternating them around the center dot, for a bit of extra visual interest. It's pretty amazing how much variety you can get from just dots, you know? It’s a testament to how simple things can often be the most effective, in a way.
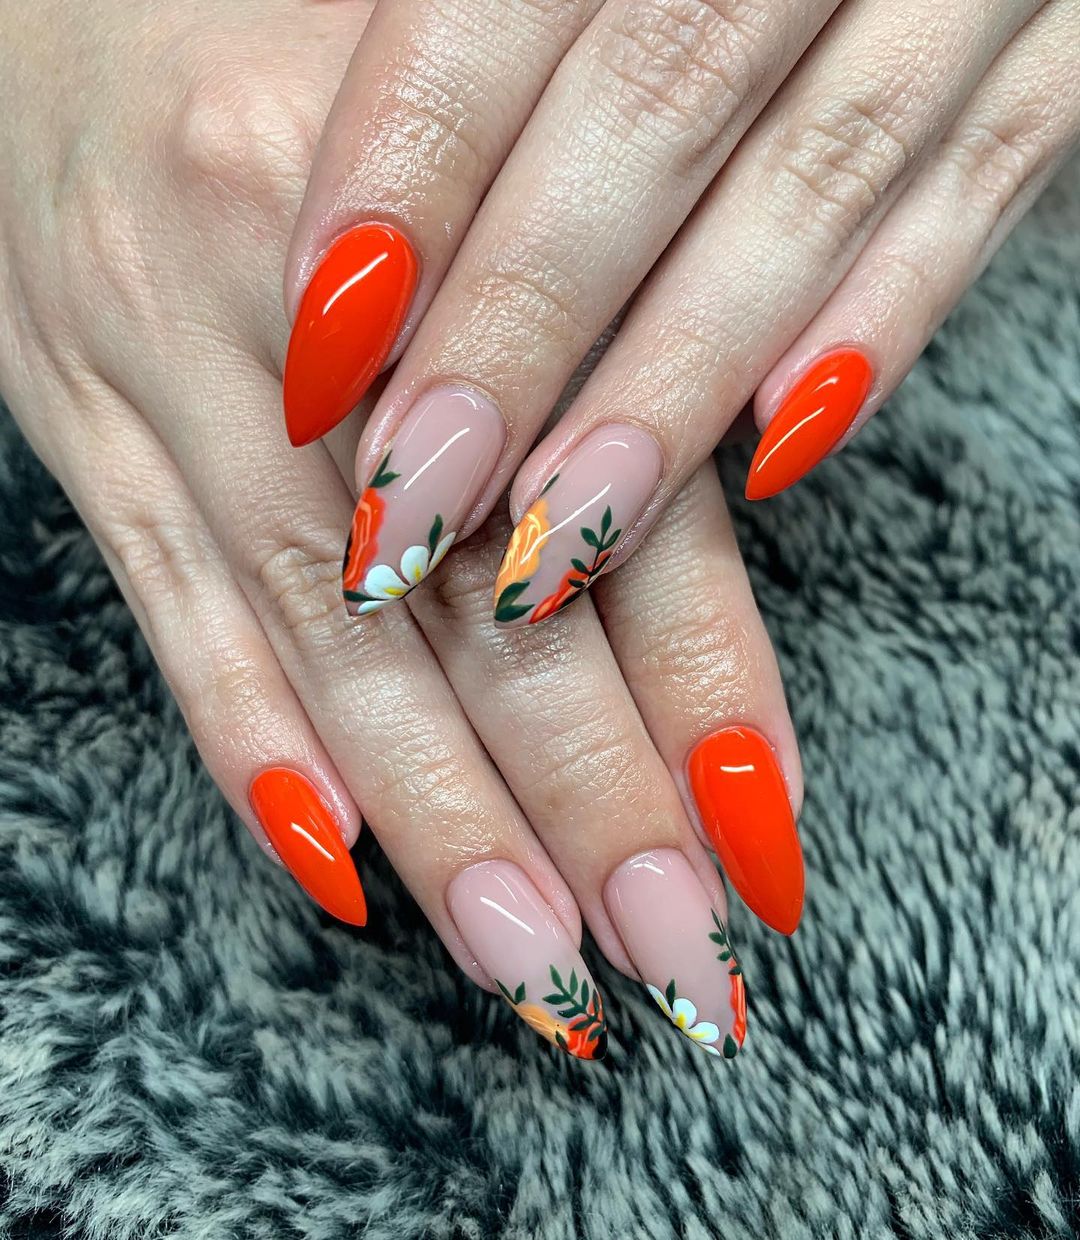
Abstract Petals- Another Easy Floral Design
If you want something that looks a bit more artistic but is still super easy, abstract petals are a fantastic choice for your easy floral nail designs. This method doesn't require precise lines or perfectly shaped petals, which is excellent news for anyone feeling a little unsure about their drawing skills. You basically just use short, somewhat irregular strokes to suggest petals, rather than drawing them perfectly. It’s about the feeling of a flower, not a photographic representation, which is quite freeing.
Start with your dry background color. Choose a polish for your petals – a soft pink, a light blue, or even a muted purple could work beautifully. Using a small brush, or even the side of a toothpick, make three to five short, slightly curved strokes radiating out from a central point on your nail. Don't press too hard, and let the strokes be a little uneven. The idea is to create a soft, almost watercolor-like effect. It's a bit like sketching, where you're just getting the general shape down, you know?
Once your abstract petals are in place, pick a contrasting color for the center. A small dot of gold, silver, or a darker shade of your petal color can work well. Place this dot right where your strokes meet, or would meet, in the middle. This instantly pulls the whole design together and makes it recognizable as a flower, even with its loose form. It's a very modern and stylish way to do easy floral nails, and it looks much more complicated than it actually is, which is always a bonus.
Tiny Buds- A Subtle Floral Design
Sometimes, you want just a hint of a flower, something delicate and understated. Tiny buds are perfect for this kind of easy floral nail design. These are so simple, they almost feel like cheating, but they look incredibly elegant. They are ideal for adding a touch of natural beauty without being too bold, which is often what people are looking for when they want something subtle. You can put these little buds anywhere on your nail, really, near the cuticle, along the tip, or off to one side.
To create a tiny bud, you'll need two colors: one for the bud itself and a tiny dot for its center. For the bud, choose a soft color like a pale pink, peach, or light blue. Using a toothpick or a very fine dotting tool, make a very small, slightly elongated dot or a tiny, short dash. This will be the main part of your bud. It's essentially just a tiny blob of color, so you don't need to worry about any complex shapes. It's pretty much as easy as it gets, honestly.
Once that tiny bud shape is there, and while it's still a little wet (but not too wet), take an even smaller dot of a contrasting color – perhaps a darker shade of your bud color, or a tiny speck of white or gold. Place this second tiny dot right on top of or slightly next to your bud shape. This gives the impression of a flower just beginning to open, or a little detail within the bud. It's a very charming and understated easy floral look that you can scatter across your nails for a truly delicate effect, and it tends to be quite popular.
Leafy Accents- Adding Green to Floral Nails
No floral design, even the easiest floral nail design, is quite complete without a touch of green, is it? Adding small leaves or leafy accents can really bring your flowers to life and make them feel more organic and natural. It’s a bit like adding a garnish to a delicious meal; it just finishes the whole presentation. And just like the flowers themselves, these leaves can be incredibly simple to create, so you don't need to be an expert at drawing anything too complex, you know?
For simple leaves, choose a nice green polish. You can use a bright spring green, a deeper forest green, or even a muted olive shade, depending on the overall feel you're going for. Using a toothpick or a very fine brush, make two tiny, short strokes that meet at a point, forming a very basic V-shape or a small teardrop. Place these next to your flowers, perhaps emerging from behind a petal or underneath a bud. You don't need to draw veins or intricate details; the shape itself is enough to suggest a leaf, which is pretty convenient.
Another easy way to do leafy accents is to simply make a tiny dot of green near your flower and then drag it slightly with your tool to create a small, elongated teardrop shape. This gives a very natural, almost accidental leaf look. You can add just one leaf per flower, or a cluster of two or three for a fuller effect. These small green touches truly tie your easy floral nail designs together, giving them a more finished and polished appearance. It's a subtle addition that makes a surprisingly big difference, actually.
What if My Easy Floral Nail Design Doesn't Look Perfect?
So, you're trying out these easy floral nail designs, and maybe one flower isn't quite as round as you hoped, or a petal went a little bit astray. What then? The most important thing to remember is that it's absolutely okay! Nail art, especially when you're doing it yourself, is about expression and having fun, not about achieving flawless, machine-like precision. Think of it like a homemade cookie; it might not look exactly like the ones from a bakery, but it's still delicious and made with care, and that's what truly counts, in a way.
Often, the little imperfections in your easy floral designs are what give them character and make them uniquely yours. No one else will have nails exactly like yours, and that's something to celebrate. If a mistake happens, you have a few options. For very small smudges or misplaced dots, you can often gently clean them up with a toothpick wrapped in a tiny bit of cotton dipped in polish remover. For bigger oopsies, you can always just remove the design from that one nail and start fresh. It's not a big deal, honestly.
Don't let the idea of perfection stop you from trying these fun designs. The more you practice, the more comfortable you'll become, and your designs will naturally get smoother. But even then, embracing the slight variations in your easy floral nails is part of the charm. It shows they were created by a human hand, with love and creativity. It's a bit like how those rice recipes from Food Network make it easy to turn a versatile grain into something wonderful; the focus is on the delicious outcome, not on every grain being perfectly aligned. Just enjoy the process, and the pretty result, too.
How Do I Make My Easy Floral Nails Last Longer?
You've put in the effort to create beautiful easy floral nail designs, so naturally, you want them to last as long as possible, right? There are a few simple things you can do to help protect your lovely art and keep it looking fresh for a good while. It's a bit like protecting your online accounts; you take a few steps to ensure everything stays secure and accessible. These steps are pretty straightforward and don't require any special skills, which is nice.
The most important step for longevity is applying a good top coat. Once all your floral designs are completely dry – and I mean completely dry, give them at least 10-15 minutes after your last dot or stroke – apply a generous layer of clear top coat. This acts like a shield, protecting your art from chips, scratches, and everyday wear. You can even apply a second thin layer the next day if you want extra protection, especially if you're hard on your hands. This really helps to seal in your easy floral work.
Beyond the top coat, being mindful of how you use your hands can also make a difference. When doing chores that involve water or harsh chemicals, like washing dishes or cleaning, consider wearing gloves. This protects both your polish and your skin. Also, try to avoid using your nails as tools, like picking at things or opening cans. These small habits can really help preserve your easy floral nail designs, keeping them looking neat and pretty for longer. It's about being a little bit gentle with your beautiful art, you know?
Making Your Easy Floral Nails Pop
Once you've got the basic easy floral nail designs down, you might want to add a little something extra to make them truly stand out. There are some very simple ways to give your floral art that extra sparkle or a different kind of finish, making them even more eye-catching. It's kind of like adding a special seasoning to a dish; it just takes the flavor to a whole new level. These additions are not complicated at all, so anyone can give them a try, which is great.
One popular way to make your easy floral nails pop is by adding a touch of glitter. After your flower designs are dry, you can apply a clear top coat with fine glitter over the entire nail, or just dab a tiny bit of glitter polish onto the center of your flowers for a sparkling effect. Gold or silver glitter usually works well with most colors, but you could also use a colored glitter that complements your floral scheme. It gives your nails a lovely, playful shimmer, which is pretty fun.
Another idea is to change the finish. Instead of a glossy top coat, try a matte top coat. This will transform your shiny floral designs into a soft, velvety look. Matte nails have a very modern and sophisticated feel, and they can make your easy floral patterns look incredibly chic and understated. It's a surprising change that can completely alter the vibe of your nails, and it's super easy to do. Just swap out your regular top coat for a matte one, and you're good to go. It’s a simple switch that yields a really different result, you know?
Beyond the Basics- More Easy Floral Touches
Once you feel comfortable with the simple easy floral nail designs, you might start thinking about how to mix things up a little bit. There are some straightforward ways to combine techniques or add subtle variations that keep your nail art feeling fresh and interesting. It's like finding new ways to use your email's organizational tools; you start exploring what else you can do with what you already know. You don't need to learn anything drastically new, just apply what you've learned in slightly different ways, which is actually quite satisfying.
Consider doing an "accent nail" with your easy floral designs. This means you paint most of your nails with a solid color, or a very simple pattern, and then pick just one nail on each hand – usually the ring finger – to feature your floral art. This draws attention to your beautiful flowers without requiring you to paint intricate designs on every single nail. It’s a very popular and stylish approach, and it’s perfect if you're short on time but still want a touch of floral beauty. It makes a statement without being overwhelming, in a way.
You could also try combining different easy floral elements on one nail. For instance, you might have a larger daisy dot flower at the base of your nail and then a few tiny buds scattered towards the tip. Or, you could place one abstract petal flower and then add a single leafy accent trailing off to the side. Playing with scale and placement can create a more dynamic and interesting look. It's about experimenting and letting your creativity flow, much like how you might experiment with different ingredients to satisfy your sweet tooth. The possibilities are pretty much endless, and it’s all about having fun with it, really.
So, whether you're just starting out or looking for new ways to express your personal style, these easy floral nail designs offer a wonderfully approachable path to beautiful, artful fingertips. From simple daisy dots to charming leafy accents, there's a world of natural beauty waiting for you to create, right there on your nails. It's about enjoying the process and celebrating the unique touch you bring to your own look.
- Baggiest Jeans In Atlanta
- Bonnie Blue 1000 People Video
- Ludwig Bulge
- Haircuts For Straight Hair Men
- Desmond Doss The Unyielding Spirit Of A Conscientious Objector

51+ Floral Nail Designs That Will Have You Bloom In Style - TheFab20s
27 Easy Yet Pretty Floral Nail Designs Perfect For Summer
Floral Nail Art Designs | Flower Designs For Wedding - Bright Cures
